This article walks you through the complete JWT (JSON Web Token) authentication setup for Oracle Analytics. Once configured, BI Connector can authenticate automatically to Oracle Analytics without requiring MFA (Multi-Factor Authentication) prompts.
The setup involves two steps:
- Generate an X.509 key pair using OpenSSL
- Register an OAuth Confidential Application in Oracle Identity Cloud Service (IDCS)
Step 1: Generate X.509 Key Pair Using OpenSSL
First, you need a private key and a public certificate. The private key signs your JWT tokens, while the public certificate gets uploaded to Oracle so it can verify those tokens.
We use OpenSSL for this. It is an open-source toolkit widely used for creating and managing SSL/TLS certificates and encryption keys. Make sure OpenSSL is installed on your system before continuing.
1.1 Create a working directory
mkdir oauth-keys cd oauth-keys
1.2 Generate a 2048-bit RSA private key
openssl genrsa -out private_key.pem 2048
1.3 Generate the public certificate (valid for 365 days)
openssl req -new -x509 -key private_key.pem -out public_cert.pem -days 365
OpenSSL will prompt you to enter certificate details. Fill in your organization information. For the Common Name, use your Oracle Analytics instance URL (for example, your-instance.analytics.ocp.oraclecloud.com).
At this point, you should have two files:
- private_key.pem — Keep this secret. It signs your JWT tokens.
- public_cert.pem — This gets uploaded to Oracle Analytics for verification.
Step 2: Register OAuth Confidential Application in Oracle Identity Cloud Service (IDCS)
This is where you create the OAuth Confidential Application. After this step, you will have a Client ID and Client Secret for your BI Connector integration.
2.1 Create the Application
- Login to Oracle Identity Cloud Service (IDCS) with administrator credentials.
- Navigate to Identity & Security → Domains.
- Select your identity domain and go to Integrated Applications.
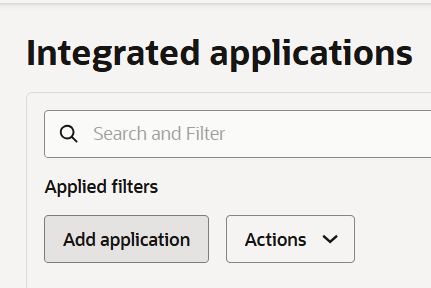
- Click Add Application.
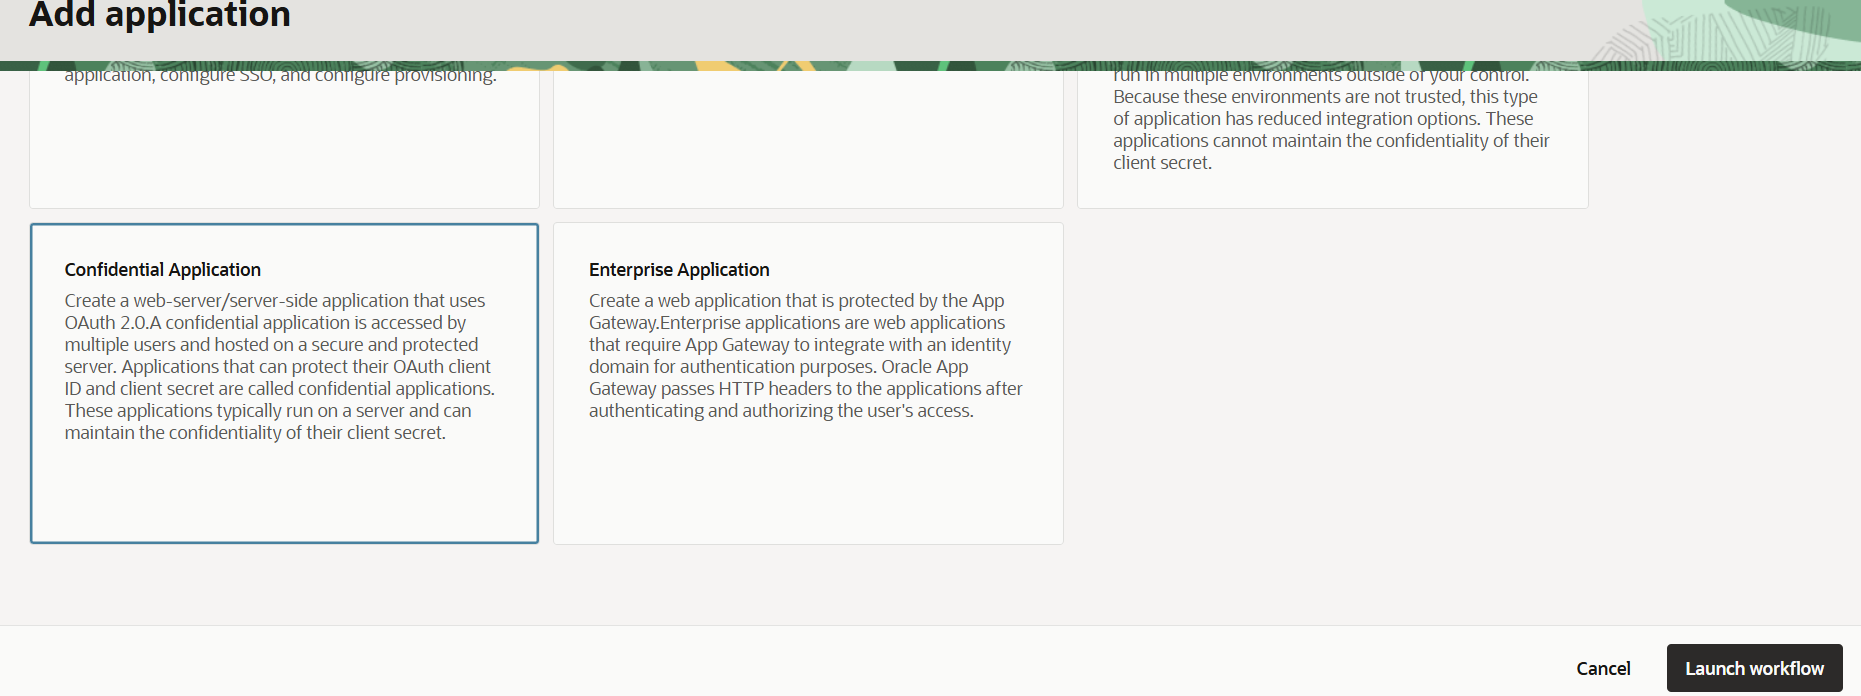
- Select Confidential Application and click Launch Workflow.
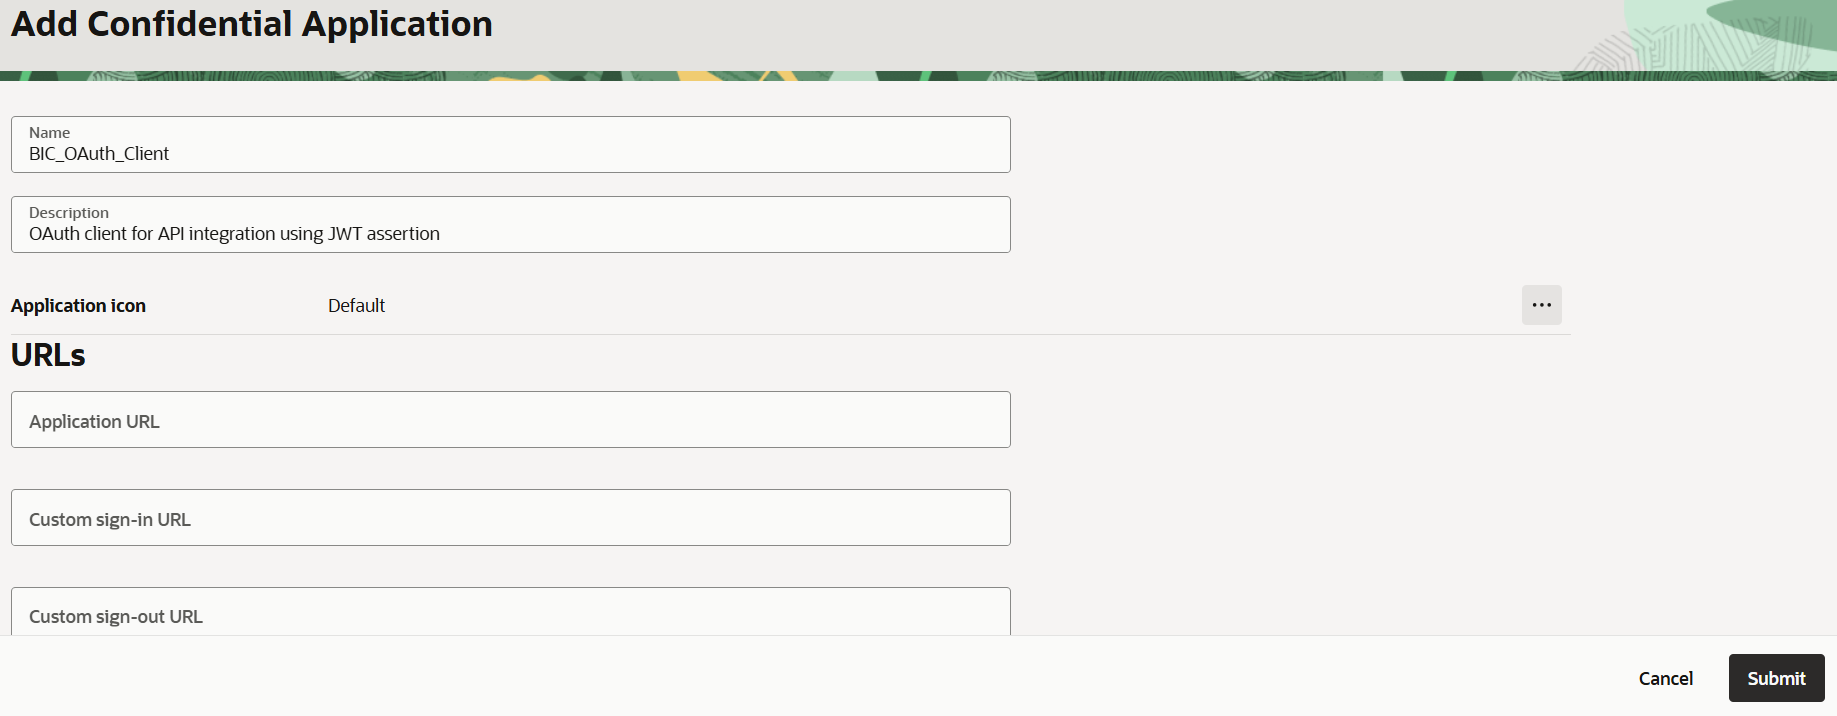
- Enter a Name (for example,
MyApp_OAuth_Client). - Enter a Description (for example, OAuth client for API integration using JWT assertion).
2.2
Create the Application
- Login to your OCI Identity Domain with administrator credentials.
- Navigate to Identity & Security → Domains.
- Select your identity domain and go to Integrated Applications.
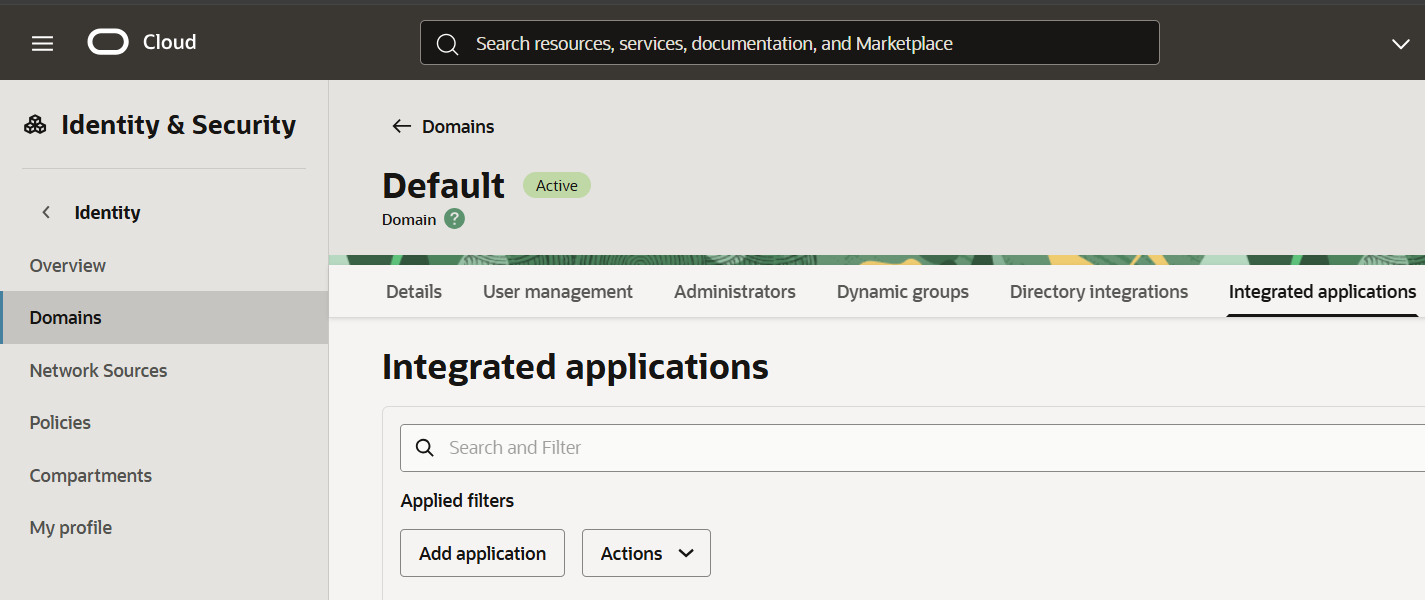
- Click Add Application.
- Select Confidential Application and click Launch Workflow.
- Enter a Name (for example,
BIC_OAuth_Client). - Enter a Description (for example, OAuth client for API integration using JWT assertion).
- Click Submit.
3.2 Configure OAuth Settings
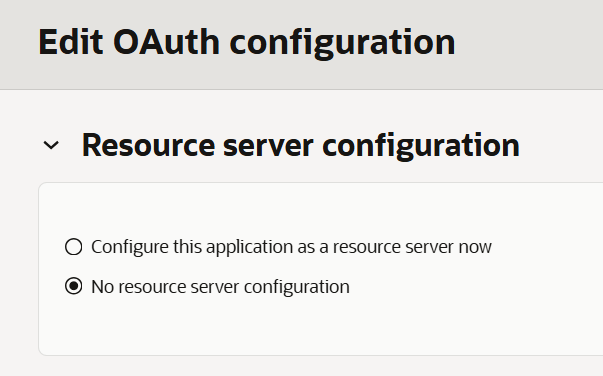
Go to the OAuth configuration tab and click "Edit OAuth configuration".
Resource Server Configuration:
- Keep "No Resource Server Configuration" selected.
Client Configuration:
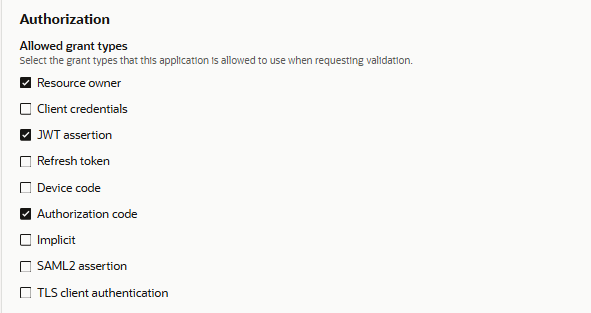
- Select "Configure this application as a client now".
- Grant Types: Check Resource Owner, JWT Assertion and Authorization code.
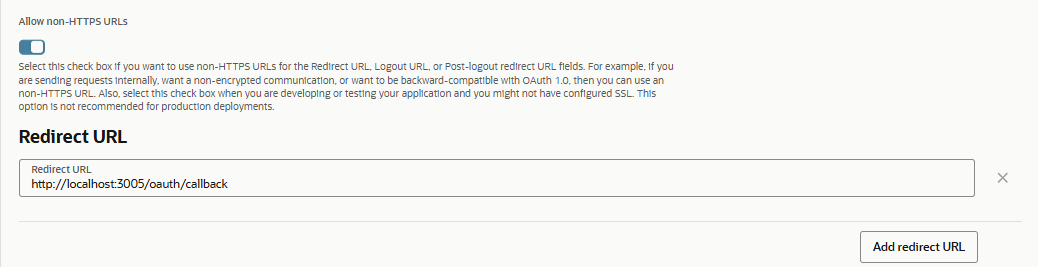
- Enable the Allow non-HTTPS URLs toggle.
- In the Redirect URL section, enter: http://localhost:3005/oauth/callback
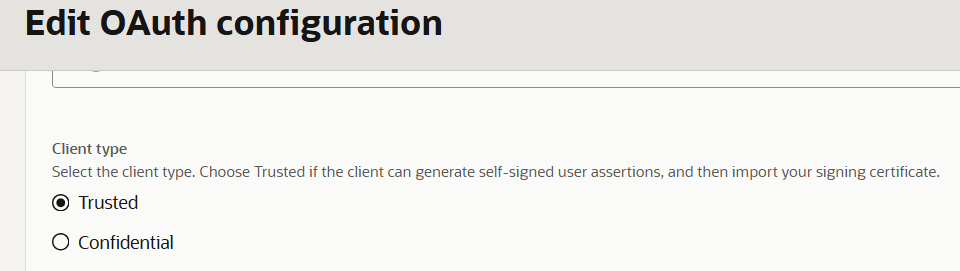
- Client Type: Select Trusted.
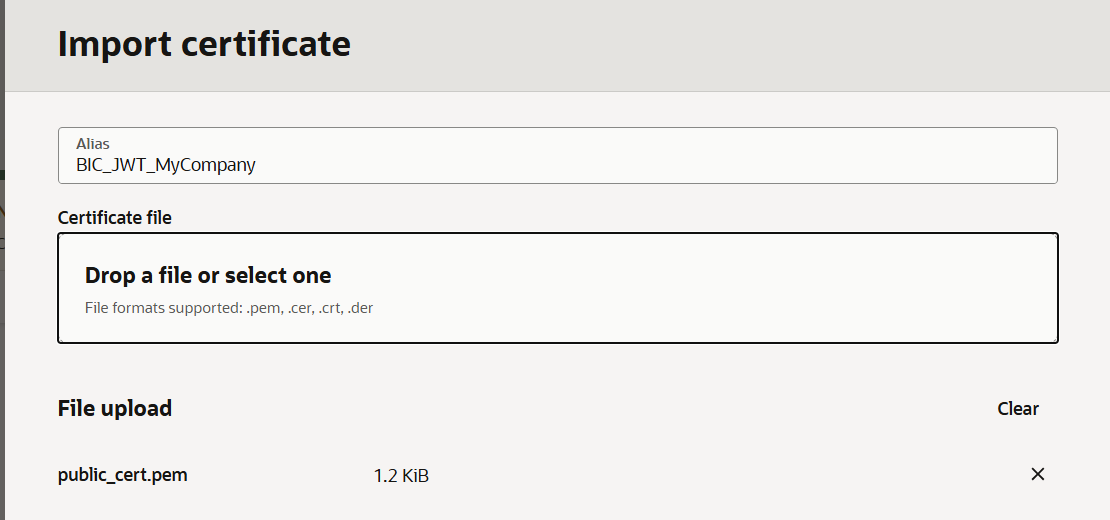
- Upload Public Certificate: Upload your
public_cert.pemand give it an alias (for example,BIC_JWT_MyCompany).
- Allowed Operations: Check Introspect and On behalf of.

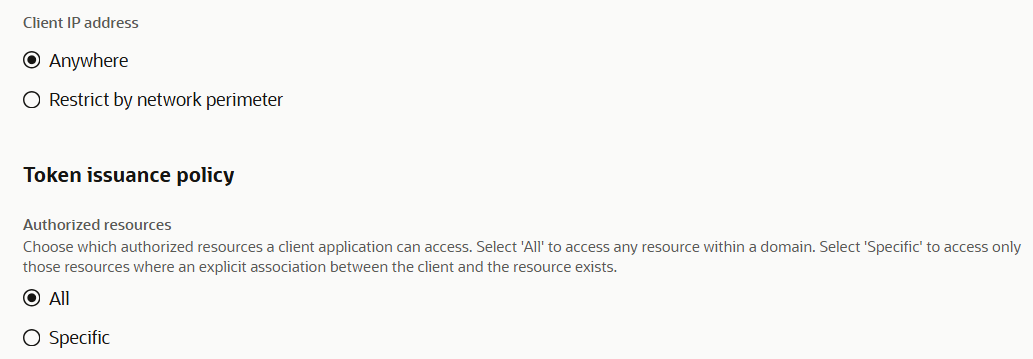
- Client IP Address: Set to Anywhere.
- Authorized Resources: Select All.
- Add Resource: Click the Add Scope button.
- Search for analytics and select the scope that ends with
urn:opc:resource:consumer::all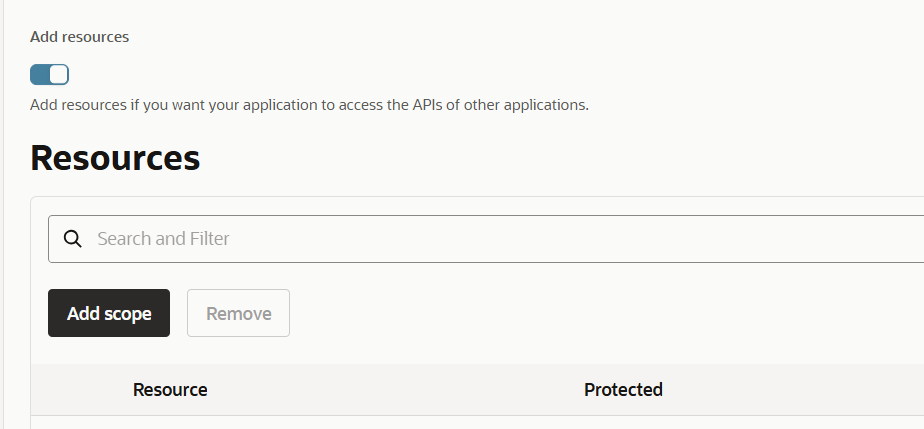
3.3 Submit and Copy Credentials
- Click Submit.
- The Client ID, Client Secret, and other configuration details will now be visible on the OAuth configuration page.
- Copy and save them securely.
Credentials Summary
After completing both steps, securely store the following values. You will need them when configuring BI Connector:
| Value | Where It Comes From |
|---|---|
| Client ID | Integrated Application → OAuth Configuration |
| Client Secret | Integrated Application → OAuth Configuration |
| Username | Oracle Analytics username for BI Connector |
| Scope | Integrated Application → OAuth Configuration |
| Key Alias (Certificate) | Integrated Application → OAuth Configuration |
| Private Key | Generated in Step 1 (private_key.pem) |
| Identity Domain URL | Your Identity Domain URL (e.g., https://idcs-xxxxx.identity.oraclecloud.com) |
Tips and Best Practices
- Track certificate expiry: The public certificate has a validity period (365 days in our example). Set a reminder to rotate it before it expires. Otherwise, BI Connector integration will stop working.
- IDCS integration is required: The JWT setup must be done within Oracle Cloud Infrastructure (OCI) / IDCS. If the Oracle Analytics environment uses a federated SSO provider outside of IDCS, JWT authentication may not work.
- Keep credentials secure: Store the Client ID, Client Secret, and Private Key in a secure location. Do not share them over email or other unencrypted channels.